
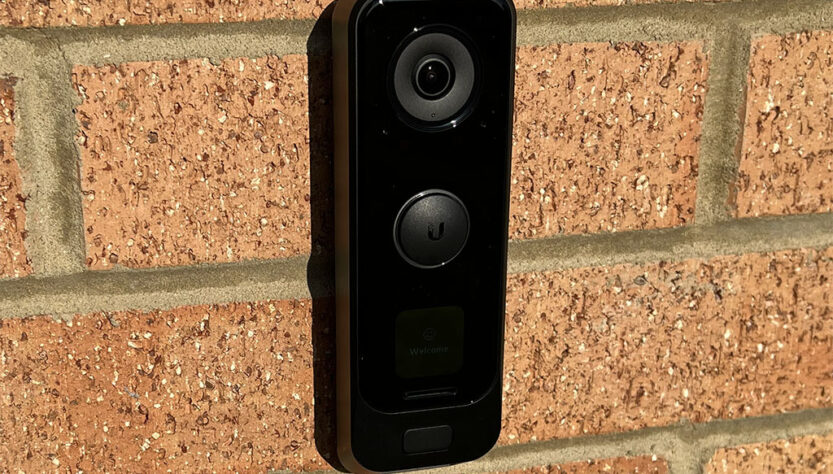
Finally the UniFi G4 Doorbell Pro is in stock in the EU (or UK) so i ordered one.
Our old doorbell is a wired button press with a Deta mechanical chime which has a built in transformer. Having a read online this is only a small 8V transformer and there is no way to separate it from the chime to wire in the transformer included by Ubiquity in the box with the doorbell.
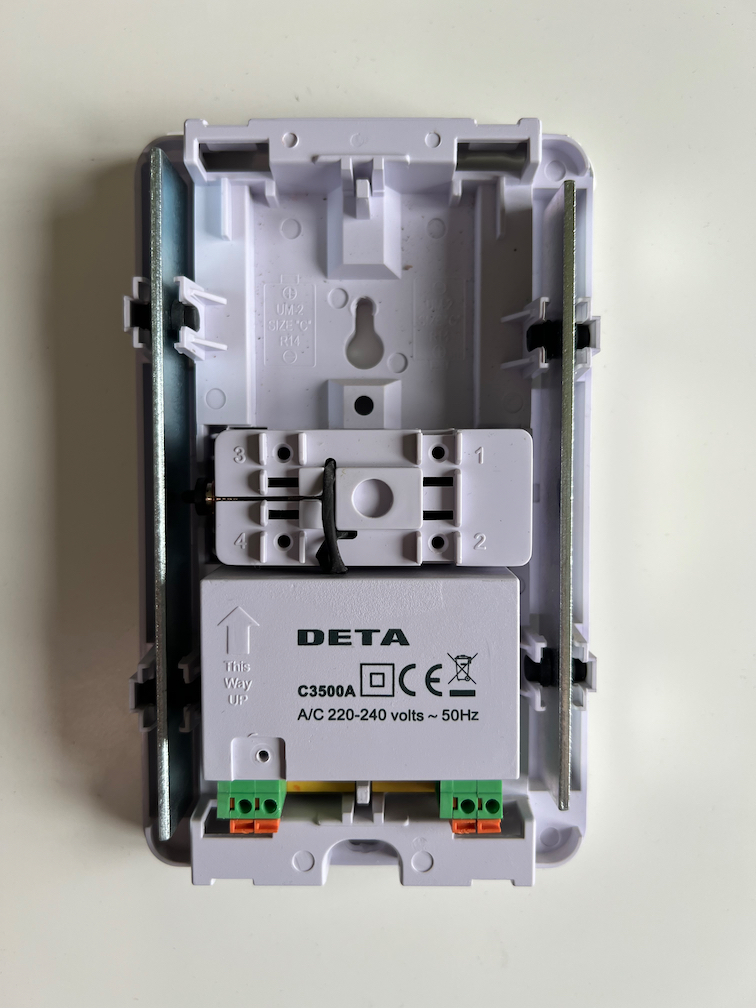
I decided to just replace the old chime and just install the included transformer in a small DIN enclosure (no chime) and see how it worked (see installed below) and yes I do need to paint around it where the old one was!
This all went well and the doorbell powered up and setup was straight forward, as is usual with UniFi gear. Soon i noticed that without a chime we would probably miss the notifications, especially when working at home upstairs. So I needed to find a solution.
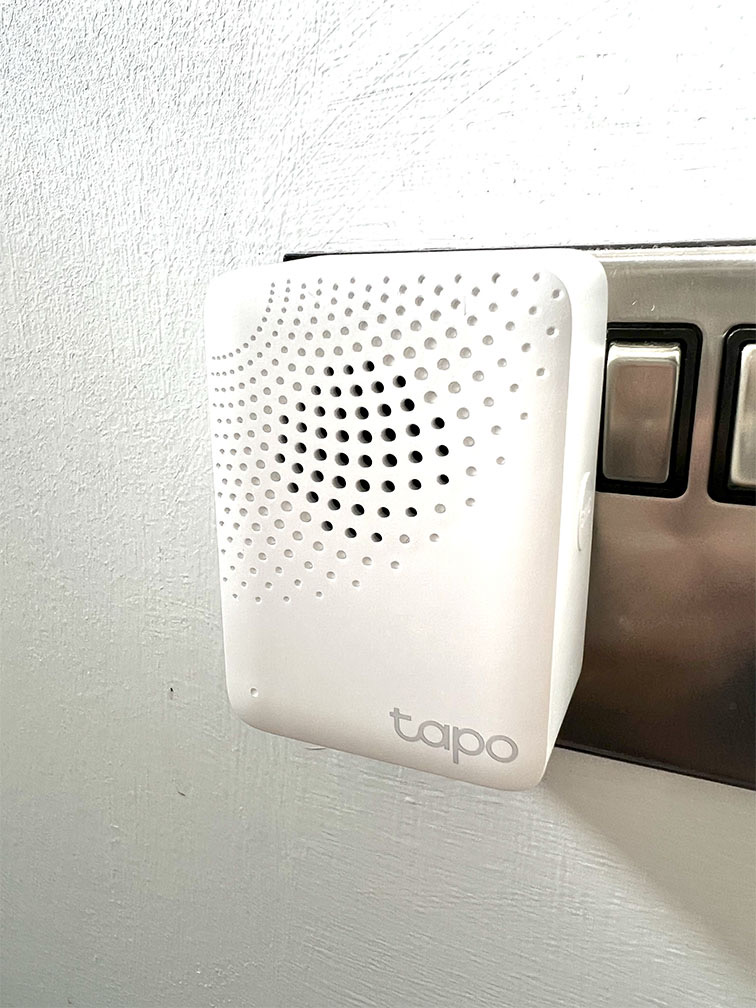
I have a bunch of Tapo devices and one of these is the Tapo H100 hub. This is used to connect the Tapo Smart Sensors and buttons. I have a bunch of their temp sensors around the house and use the buttons to control light strips in my office.
I use Home Assistant and wondered if there was an integration to allow these to connect.
Home Assistant has a built in integration for UniFi Protect which detected the new Doorbell great but unfortunately there is no integration for Tapo… or though I initially thought…
First add Unifi Protect integration to Home Assistant
In Home Assistant go to Settings > Integrations > Add Integration > Search for Ubiquiti and then select Ubiquiti and a few Unifi items are shown
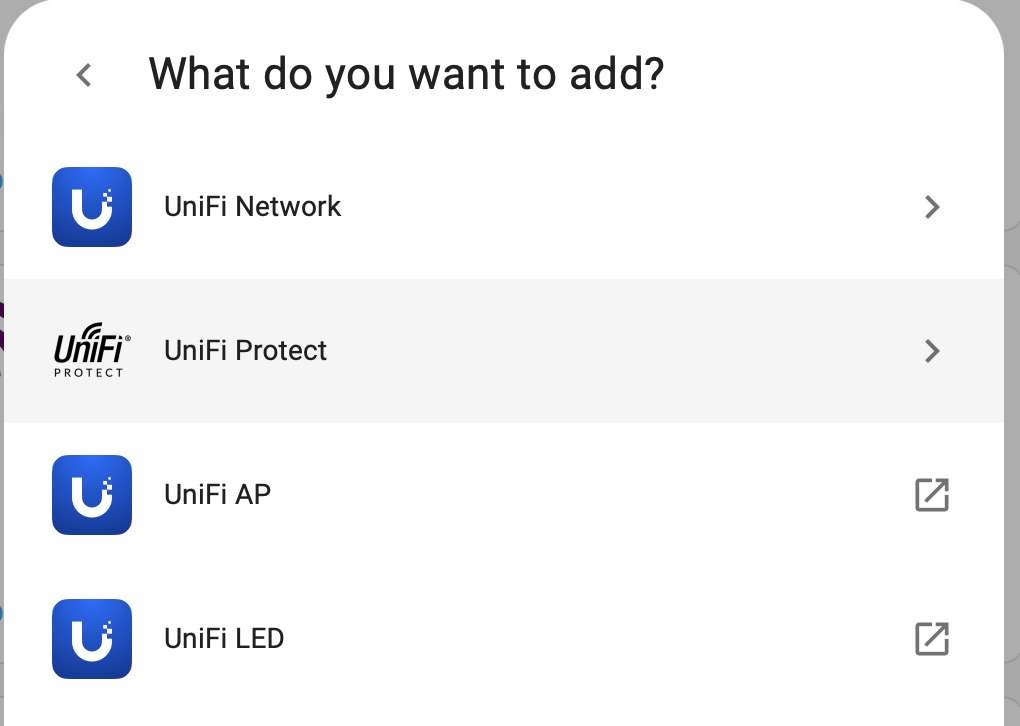
Select UniFi Protect to get started
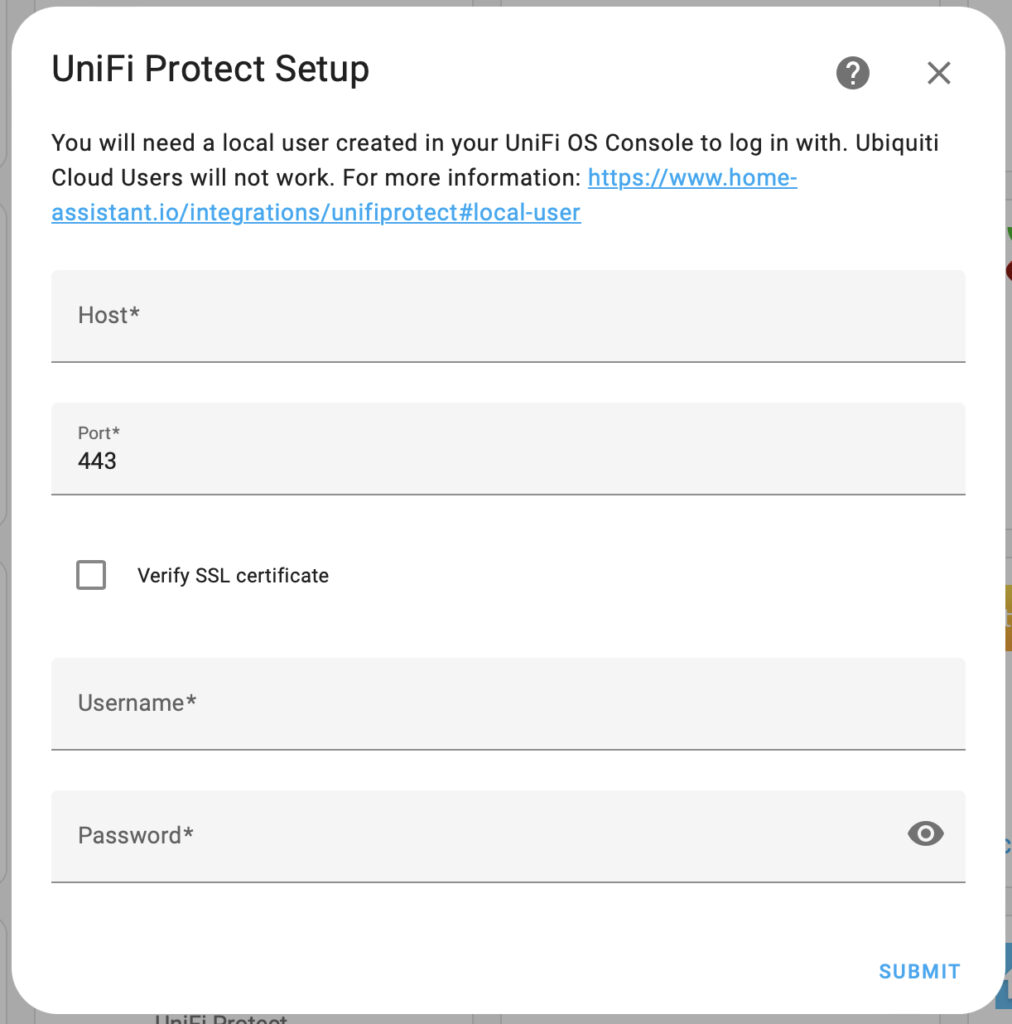
Enter your UDM or UNVR IP address and your username and password (local account). Its best to setup an account specifically for Home Assistant and grant it full permissions to Protect.
Once this has complete you should be able to see your cameras and devices in Protect within Home Assistant.
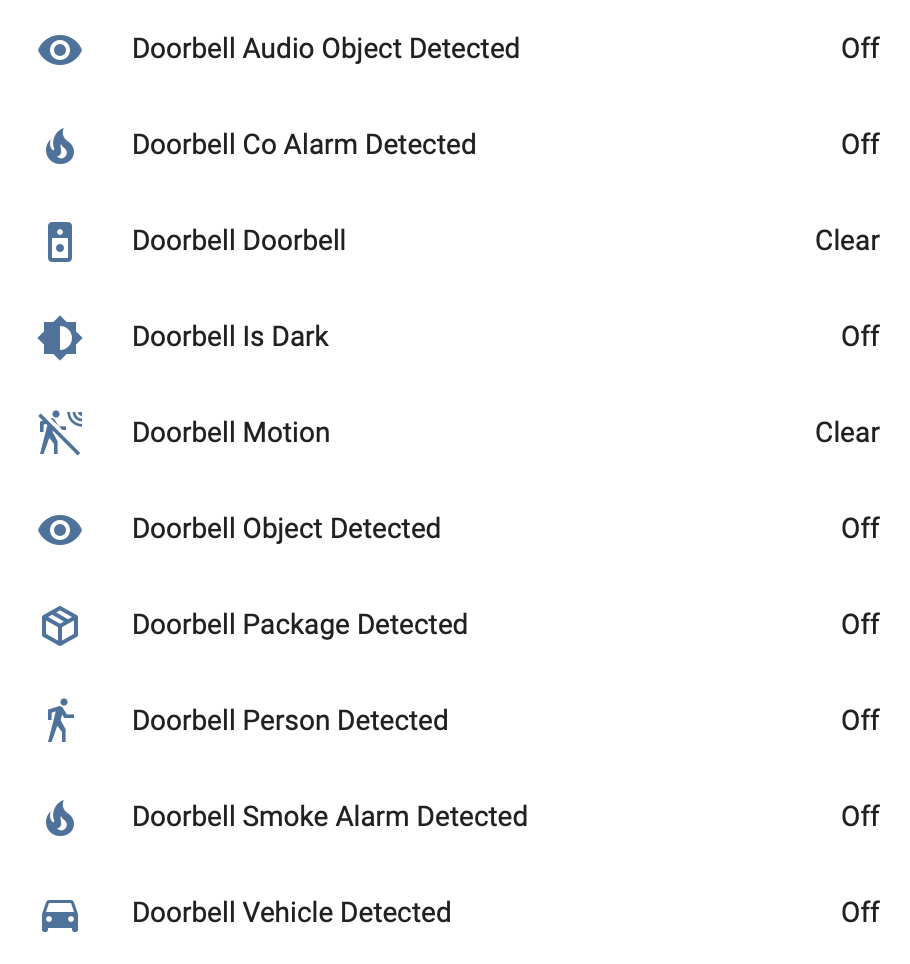
My Doorbell is simply called ‘Doorbell’ in Home Assistant, the item we are interested in here is nicely named ‘Doorbell Doorbell’. If you want to setup any automations now, you can but since we want to integrate with Tapo we have more to do.
To integrate with Tapo we need to use HACS, you should be able to add HACS as an integration, or follow the docs to setup here.
Once installed you should see HACS on the left menu of Home Assistant.
Select HACS > Integrations > Explore & Download Repositories, the search for Tapo
Select ‘Tapo Controller’ and Download
Once downloaded you’ll need to restart Home Assistant for it to find it.
Within HACS > Integrations you should now see Tapo Controller.
Now within Home Assistant > Settings > Devices & Services > Add Integration > Search for Tapo and you should see TP-Link Tapo add this.
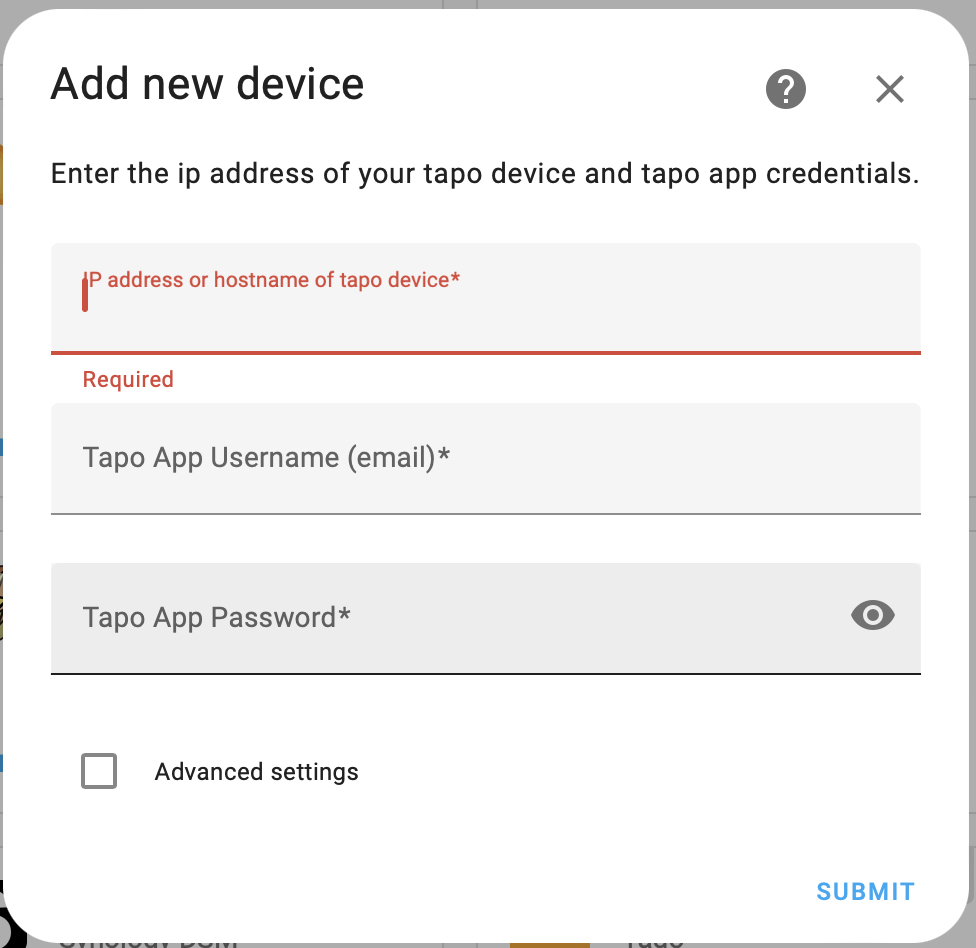
Enter the IP Address of the Tapo Chime (find this either in UniFi or the Tapo app) then enter your Tapo username and password (used for the app).
Once done your Tapo Chime should appear in Home Assistant with one control (the siren) and two sensors (overheat and signal level).
You can now add the Automation for the Doorbell Siren. Goto Settings > Automations & Scenes > Create Automation
Add a Trigger for the ‘Doorbell Doorbell’ where from is ‘Clear’ and to is ‘Detected’ as below.

Then add the Actions, I’ve added a ‘send notification’ action to send a push to my phone but to trigger the siren call the service ‘Siren: Turn on’ as below.

Triggering the siren turns it on, but leaves it on. You then need to run the call service again to turn it off.
I added a delay for 1 second and 200ms (that seemed to be about the right time for one siren run to complete before turning off the siren again. Adjust as required for the time you need.
[…] there is a UniFi Protect integration for HomeAssistant (see my other article on the G4 Doorbell integration to get it […]